
Cart 0
Making a demo is just as important as writing the song, I’m sure by now you’d agree with me, as we covered “What Is A Demo and Why Is It Important” in my last post. As we know, demoing is super useful in many ways, like helping to structure the song and helping to refine and capture the magic in the song. It also serves as a framework for final studio recording, and let’s not forget the money part too. So up next is Part 2, “How to Make Them,” and not just make them, but make quality DEMOs.
It’s “TimiJay on the Track.”
I hope you’re as excited as I am to delve into the art of creating a quality demo. After all, it’s an important step towards showcasing your talent/skill and gaining recognition for your hard work. Here are the areas we’ll be covering on today’s journey (every journey you take with me brings you a step closer to your dream of being a pro).
- What you need to make a Demo
- Seven Steps to cooking up a Quality Demo
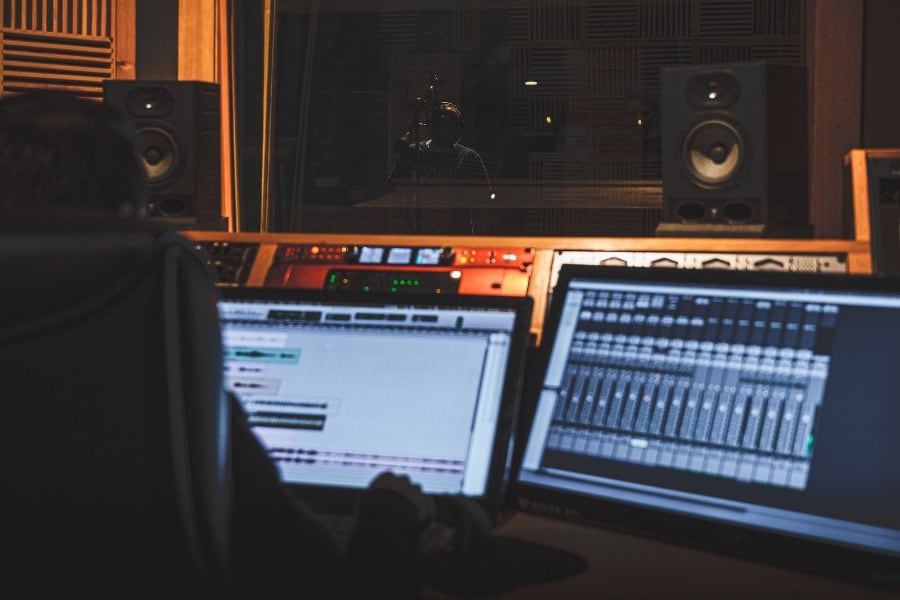
WHAT DO YOU NEED TO MAKE A DEMO?
The goal of this particular blog post is to teach you how to make quality DEMOs and just like cooking, the first step is knowing what ingredients and utensils you’ll need. Here is the basic breakdown of what you need:
Your computer
An Audio Interface
DAW (Digital Audio Workstation)
A Microphone
Any instrument of your choice
If you’re wondering about the specifications or recommendations for any of this equipment do check our post on the essential equipment for mixing and mastering for beginners (here’s the link).
7 STEPS TO COOKING UP A QUALITY DEMO
It is a great practice to get the best recording quality possible, even for a demo. Regardless of what you’re going to use it for, be it to pitch a collab, get yourself a record deal, or even for yourself. It’s best to get the highest quality possible because you never know when it will come in handy.
With that being said, let’s run through the steps.
#1 Set Up Your Equipment
This sure is the first step to creating a quality demo, with little practices like setting up your mic properly and making sure there are no reflections, opening up your DAW after starting up your computer, making sure connections are secure (check connections to your mic, audio interface, instruments, and your DAW), and lastly, making sure you’re actually recording (finding out you were not actually recording after you created magic can be more painful than a heartbreak no caps). It’s also noteworthy that you arrange your song if you have all your lyrics set.
#2 Build The Bed Tracks For Your Demo
This is the part where you lay down your instrumentation, like the drums, bass, guitar, piano, or synth part, and even loops if necessary. There is no one way to do this, I personally start with the drums, then the bass, or guitar, and lastly the keyboard.
#3 Lay Down The Scratch Vocal
Now it’s time to lay the scratch vocals and by scratch vocal it means you might end up not using this vocal. It will just help build other parts around it. It’s better to do the lead vocal although you can do the harmonies too.
#4 Embellish
This is a really fun part that allows you to go wild in creativity, you’re basically just adding extras to beautify the song, more like adding seasoning and spices to your food (you dey feel am). So create hooks with the guitar, add rhythmic keyboard parts, and experiment with pads. Let your creative imagination run wild, but remember to not overdo it, Bros abegggg!
#5 Time To Lay The Vocals
I’d say this is the final step, but I remember I said 7, so let’s go.
Now it’s time to lay the actual vocal; as said, it’s fun too. Make sure the vocalist isn’t too sharp or flat. The vocals can be compiled here to make up for mistakes, but make sure the best work is done regardless because the goal is to create a quality demo.
Before we get to the part I call magic, the secret ingredient part (grins evilly), I want us to understand that this section is what separates men from boys. After that’s been said, let’s go!
#6 Mixing
The magic begins now, in fact, I should put these two final steps in the VIP section because they’re like that celebrity who just shows up in your video and it’s already a hit, but oh well, they’re humble. Let’s get started. While mixing isn’t something I can sum up in a few words, I’ll point out a few things that can change the game. To begin, set all of your faders (volume sliders) to zero on each track. Next, we start with the drums and move to the bass, keyboard, and the like, raising and lowering the levels until the track is well-balanced. I bet it’s sounding better all of a sudden.
Now, let’s go into depth on that track. First, we create a musical space with our pan knobs by moving our instruments to the left or right, and then BOOM! There is a noticeable difference. Keep the kick, snare, bass, and lead vocals in the center of the mix; it’s more advisable that way. With that, we’ve made a significant difference (I wasn’t joking when I called it magic). On to mastering!
#7 Mastering
When you export your file, it will most likely sound very quiet, which is yet another reason to have your demo mastered. Before we go any further, keep in mind that any mistakes in the mixing will be amplified by the mastering, so take care of that first. Also, an acoustically treated room is essential for both mixing and mastering, so make that a priority. Moving on, consider the level at which your mix is peaking; it should be between -6 dB and -3 dB. Adjust your volume if you’re too loud or too quiet. Then comes EQing for tonal balance, compression to reduce dynamics, soft clipping, and finally loudening. To remove unwanted frequencies and improve overall tonal balance, use a surgical EQ such as Fabfilter’s Pro-Q or Logic’s Channel EQ. Adjustments should be subtle. For compression and soft clipping, Ableton’s Glue Compressor or Cytomic’s The glue can be used to achieve subtle compression without destroying the mix and to reduce dynamic range with soft clipping. Careful adjustments are needed to find the right attack and release times. Finally, steps for making your demo louder:
- Adjust the volume levels of individual tracks to balance them out.
- Reduce the dynamic range of your mix with compression to make it sound more consistent.
- Use limited to increase the overall volume of your mix without causing clipping or distortion.
It’s also useful to have an already mastered track as a reference while you work your magic, but remember to turn down the volume of the mastered track because it’ll be louder than yours, so turn it down until they’re on the same level.
So there you have it, how to cook up a quality demo. As we’ve discussed, there are several steps you need to keep in mind when cooking up a demo that will truly capture your audience’s attention. But it’s not just about following a set of guidelines – it’s also about pouring your heart and soul into your music and letting it speak for itself. When your demo is played, it should be able to communicate your passion and dedication to your craft.
I know that putting your work out there can be scary. It’s okay to feel nervous about the possibility of rejection. But remember, every successful artist was once in your shoes. The key is to keep pushing forward and sharing your music with the world. Some may reject it, but others may be blown away and become your biggest fans. So, what are you waiting for? It’s time to take action and share your work with the world. Trust me, all your hard work will be worth it in the end. I can’t wait to hear your success story and see where your talent takes you. Keep striving towards your goals, and never give up on your dreams.